


Product information
Verdict
PROS
- Well-designed machine
- Superfast heating
- Whisper silent
CONS
- Awful filament holder
- Delicate wiring
- Uneven heat dissipation
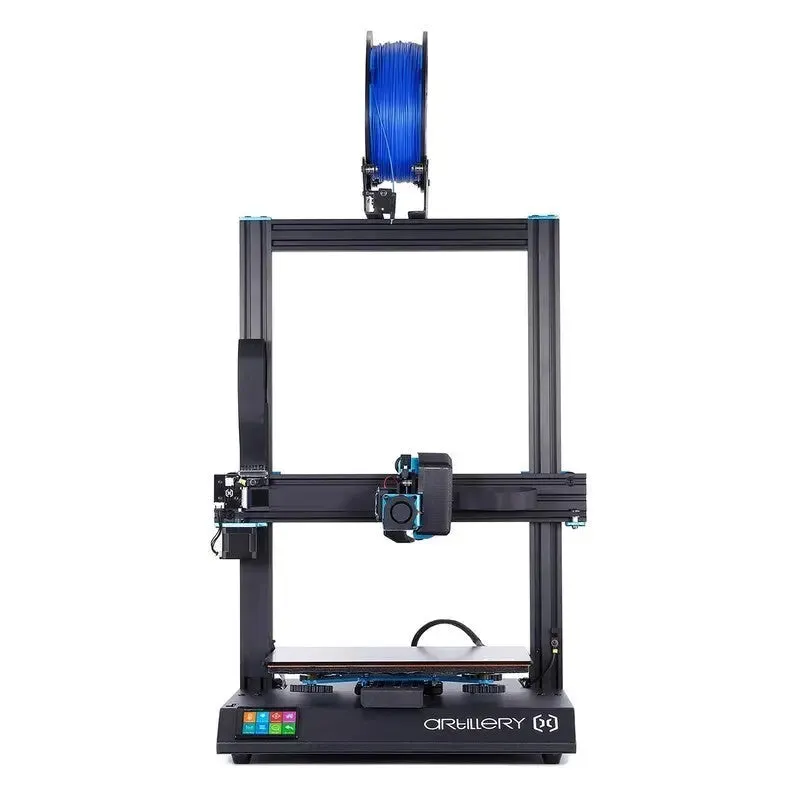
The stock Artillery Sidewinder X1 already boasts a lot of features you would think of upgrading similar budget printers with.
Be it the X1’s direct drive system, its AC heated bed, or its super silent motherboard and fans, the Sidewinder stands out amongst its budget competitors. Paired with its spacious 300 x 300 x 400mm build volume and sleek appearance, this 3D printer appeals to tinkerers and beginners alike.
Naturally — given the price category — the printer does have its pitfalls. Especially the ribbon cables that endow the printer with such a sleek look are prone to break over time, and the thermal inequality of the build plate can lead to problems when printing with temperature-sensitive filaments.
However, the out-of-the-box experience was — mostly — fun, and we would still recommend it to beginners (with the patience to possibly tinker further down the road) as well as experienced users. It’s a solid starting point capable of great prints.
The Tech
Artillery, a Shenzhen-based 3D printer manufacturer (that also appears to market its printers under the Evnovo brand) leads its lineup with the Artillery Sidewinder X1, a large desktop 3D printer, that boasts topline features such as a sturdy chassis, direct drive extruder system, and a big, fast-heating print bed.
While all were present on the previous Sidewinder X1 machines, the latest is said to be the one. So let’s get into the details.
SLEEK DESIGN
The Artillery Sidewinder X1 is one of the countless Creality CR-10-style printers that surfaced after the immense success of the model. However, the Sidewinder X1 is not a mere clone, neither from the installed tech nor from the overall appearance.
Unlike its source of inspiration, the Artillery Sidewinder X1 has the power supply, mainboard, and touchscreen neatly stored in the base unit. This gives the 3D printer a sleek and professional appearance, quite unlike similarly priced printers that put out much more of a DIY-vibe.
CABLES
One of the main reasons the Sidewinder differentiates itself from its competitors is the use of ribbon cables. And to be quite frank, this elevates the X1 from a design perspective right up there to the top. Unlike a great number of budget desktop printers and the fistfuls of spaghetti-like cabling they come with, the Artillery Sidewinder X1 deviates itself with neatly arranged large ribbon cables.
However, style and functionality don’t always go hand in hand. Some users of previous X1 iterations faced problems with ribbon cables wearing out and breaking at the connector pins due to rapid motion. Obviously, our contact with the machine is limited compared to an owner running one for months. Still, during our fortnight review, there was nothing to suggest the cables were put under undue stress, even at the printer’s limits of movement. But Artillery does include spare ribbon cables, so it seems they are aware of the problem.
To prolong the lifetime of the ribbon cables and connectors, tinkerers have come up with multiple.
THE FRAMEWORK
Another welcomed and seldomly seen feature is the use of hefty 20 x 60 mm extrusions for the bed rail and x-axis on the X1. Having a sturdy Y-axis rail is somewhat common nowadays, even on budget printers. Still, the 60 x 20 mm extrusion on the X-axis is a rarity, as most printers make do with a 40 x 20 mm at best, even 3D printers with a direct drive setup – such as the . Now keep in mind that these notoriously need more rigidity on the X-axis due to the increased weight of the extruder.
The Z-axis is operated by a dual lead screw setup with anti-backlash nuts on the back, and to keep them synchronized, a connector belt with a pulley — a measure that addresses potential desyncing of the dual lead screw motors over time. While it is not the top-notch solution, as dual end stops would be, it does a decent job, and we faced no desyncing throughout our review.
The Z gantry itself is made of strong 20 x 40 mm extrusions held in place atop the base unit by four screws. Having a solid scaffold ensures less Z-wobble when using that tall build space. However, we found having a more robust connection between the base and gantry – such as an angle connector – wouldn’t hurt, especially as the Sidewinder tends to struggle with Z-wobbling towards the top of its Z-axis height.
Nonetheless, the Sidewinder manages to put out a sleek but also sturdy appearance.
THE BED
The heart of every 3D printer is its print bed. In the Artillery Sidewinder X1’s case, the heart is comprised of a 300 x 300 x 400 mm sized porous ceramic coated glass surface.
Print volume-wise, this puts the Sidewinder X1 slightly above average. However, where the Sidewinder is pretty much uncontested, is its ability to get from naught to printing. To quantify it, the Sidewinder’s heated bed leaves others in the dust, heating from room temperature to 60°C in approximately 45 seconds. And, for the sake of completeness, the nozzle is in no way inferior.
But back to the bed at hand. The Sidewinder achieves these Speedy Gonzales-like top speeds due to mounting the heater directly to the underside of the glass sheet with no metal plate in between, and the bed being AC heated instead of the more commonly used DC-heated variant. This means the bed is heated directly with 220/110V (depending on your region) instead of 24V.
While on the one hand, this does lead to superb heating times, there is also the risk of an electric shock, especially if the connectors are exposed to a lot of motion over time. In Artillery’s defence, we found no loose ends; all the wires were insulated. Nonetheless, we would have wished for strain relief for the hotbed wiring.
We did notice, though, that the actual surface temperature of the plate falls short by around 10°C, something to keep in mind when printing with temperature-sensitive materials that require a heated bed. However, the major headache is that the heated bed does not provide equal thermal dispersion, meaning that the temperature decreases towards the outer fringes of the bed. This can cause some major adhesion problems when printing (large-sized) objects with materials that are prone to warping.
The print surface is a ceramic glass plate, much like the oft-copied and its superb bed adhesion. In short, the textured surface expands when heated, providing the needed material adhesion and shrinks again when cooling down, resulting in the prints popping right off.
One last minor drawback is that it is not removable. Granted, with the prints popping off nicely, there is seldom a need to remove the print bed to shove the spatula sideways in order to get the print off the bed. But especially with the bed’s thermal inequality, using some extra bed adhesion in the form of glue might come in handy, and removing and cleaning off the glue after a print would be much easier with a removable bed.
All in all, though, we would prefer the coated glass build plate over a regular glass or PEI sheet any day of the week.
THE EXTRUDER
Well, if the bed is the heart, the print head is … heck, we don’t know. Anyway, this is where the magic happens. In the Sidewinder’s case, this is done by a direct Titan Aero-style extruder and a Volcano-style hot end.
Having a direct drive setup is something of a rarity in the Sidewinder’s price segment – here it performs well and we’re glad for its inclusion. We already mentioned the 40 x 60mm extrusions allowing for stable travel of the print head and reducing backlash, as well as the sturdy gantry and dual Z-axis lead screws.
As indicated earlier, the Sidewinder’s hot end is also rather speedy when it comes to heating (nought to 200°C in under one minute) and can go as high as 270°C. However, we would recommend staying within the consumer material temperature range of about 250°C for the most part as otherwise, the cold end of the extruder might become damaged.
As is typical for the volcano-style hot end, you can work with some pretty high flow rates, due to its elongated melt zone, allowing you to use nozzles with a 0.8mm or even 1mm diameter effectively.
As customary, the Artillery Sidewinder X1’s extruder is equipped with two fans. One to cool the extruder, which does a decent job, no complaints there, and the other one to cool the prints, which, well, let’s just say it’s clocked in. It seems to be the single most-agreed-upon opinion across all boards and forums, that the second thing you should print is one of the many (the first thing should be a filament spool holder). From our experience, the 30 x 10mm part cooling fan is not completely useless, but by no means optimal. Ironically, for the little it does, it is still the loudest part of the machine during printing.
CONNECTIVITY & UI
To oversee the whole printing process, the Sidewinder X1 features a 3.5-inch colour touchscreen. The interface is easy to use, with different colors for different submenus. Also, all the features are accessible, and we couldn’t find any of the bugs you sometimes find on similar budget firmware.
Connectivity-wise, the Sidewinder X1 does support micro SD, and – our personal favorite – USB.
Artillery Sidewinder X1 3D Printer
$ 59.25
$ 45.58
You May Also Like

$ 84.98
$ 65.37
Asus Motherboard Prime B650M-A II
")
$ 83.14
$ 63.95
ASUS ROG ALLY AMD RYZEN Z1 16GB/512GB SSD HANDHELD GAME CONSOLE (WHITE)

$ 25.99
$ 19.55
AMAOE Samsung Middle Layer Tin Planting Platform With BGA Stencil
 Booster Pack")
$ 63.88
$ 49.14
Digimon Beginning Observer (BT16) Booster Pack

$ 72.01
$ 55.39
ASUS TUF Gaming A15 AMD Ryzen 7 7435HS, 8GB RAM, 512GB SSD, RTX 2050, FHD 144Hz, Win11, 1 Year Perfect Warranty
 Gaming Console - 1TB / Black - CUH-7016B")
$ 85.15
$ 65.50
Sony PlayStation 4 Pro (PS4 Pro) Gaming Console - 1TB / Black - CUH-7016B

$ 75.93
$ 58.41
iPhone 14 Pro Max 128GB

$ 64.08
$ 49.29
Granule Spreading System V2.0
")
$ 20.00
Kingston Digital USB 3.0 Super Speed Multi-Card Reader for SD/SDHC/SDXC/microSD/MS/Compact Flash CF Cards (FCR-HS4)

$ 55.63
$ 42.79
Canon EOS R10 Mirrorless Camera
